Page 2
Converting your Van can be an inexpensive process but that will depend on
how resourceful you are. Carpet remnants can be used and duct taped together from the bottom side, used ply wood for the flooring, used 2x4's and 2x2's will save you lots of money. Similarly with electricians
tubing and auto accessories. If you are a scrounger this project could
be one of the greatest times of your life. Flea Markets abound each spring and for a few dollars one could fit out their Van for cheap.
Setting up the Bed ends will require locating 2x2's or 2x4's over the rear wheel wells to a body seam near the rear doors to attach the lumber to with screws. It will need to be level and both sides of the Van set up just alike. This should be
sturdy enough to carry the weight of a couple of adults. Once in place stretch a line across the width of the bed space and measure from the middle of the line to the floor. This will define the height of the storage box that will go across the middle of the bed to support it. Build the box out of 2x4's with the opening facing into the Van. It should be 12" wide, long as the bed board is wide, and the height you measured from the string to the floor when covered with 1/4" ply wood. Small items can be stored inside of it. I've found card board boxes that fit inside mine so I could pull it out like a drawer.
The bed board is a 1/2 inch sheet of used ply wood cut to fit the 2x4's at either end. You may have to cut the board across the center and install a couple of roofing clips into the cut when the bed board is set in place. The cut will rest over the storage box and help stabilize it. Next the length and width dimentions
need to be taken of the bed and a mat needs to be fabricated for the bed.
A 6 inch thick heavy density upholstery foam cut to this size and sewn up in matress covering fabric will serve well. You may find a used mat from a salvaged
pop up tent camper to use for this.
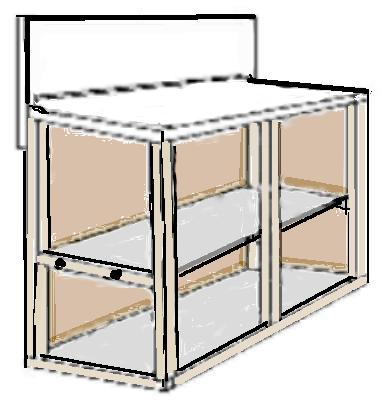
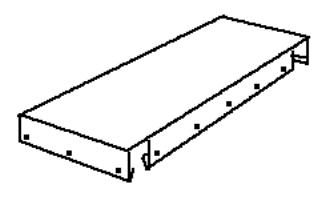
The cooking, storage, and table Cabinet is open to your creativity. It should be straighforward and simple with one shelf across the mid height.
You can install a couple of rope handles on the end to set it outside if you camp and wish to cook outside. I carried a iron skillet, campers aluminum mess kit, utility stock pot where I stored the mess kit, & cooking utensils
etc, inside of to save space. Dish washing liquid was carried in a 4 oz bottle and my cooking spices were in the small 35mm film containers I saved and labled. I used small card board boxes inside of it to contain and organize my stuff where the food items I carried were mostly staple
items for cooking. When I traveled I'd buy can goods, meat, etc along the way as needed for that meal. The idea is to travel light.....not to go
homesteading. So you'll need basic cooking stuff, and some utility tools and supplies to set up camp with. I also installed a piece of sheet metal
across the back of my cabinet for a cooking splash garde. The top of the
cabinet should have some form of thin metal covering on it as well. The doors will be made of 1/4" ply wood and one will have 1/2 of a folding
Tail Gate table mounted to it so the legs will fold up under it and then the
hinge will allow it to fold down over the door and out of the way.
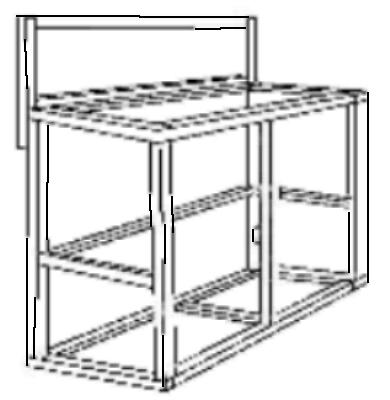
A rough sketch of the framing to
construct your cabinet. This is
sturdy and light weight. When the ply wood is attached it will
become much more solid. The
ends and back side will have the
ply wood installed on the outside.
The top, middle shelf, and bottom
shelf will be on the top side looking down. The splash garde is
shown but will be attached with 4
screws later after sheet metal is
attached to it. Doors will cover the front. Folding table on left.
The next step after framing the cabinet is to install the shelves.
In this way the framework is open and it will be easier to fit and
nail the shelving in place. The top should be covered with thin sheet metal as it is should be a durable cooking & food preparation surface
that can be cleaned. Likewise with the vertical Splash Garde. The
middle and bottom shelf could be painted a light color so it will be easier to see into the interior.
Again, much will depend
on what you can scrounge
to build this project.
If you find some 3/8 or
1/2 inch ply wood it may
make for better shelving.
1/4 or 3/8 inch ply wood
would make good covering
for the cabinet as well as
doors. Aluminum coil stock would be good for the top and splash garde.
A 48"L x 14"W x 32"H
Cabinet would be ideal.
A piece of 1/2" thick rope can be tied through the two holes in the
middle shelf frame at either end to serve as handles for lifting or
moving the cabinet. Try to keep the weight to where it is movable.
Aluminum coil stock comes in a roll and is used by making continuous
rain guttering. You may be able to buy scrap pieces of this for cheap from a contractor. This is often brown on one side and white on the other. Allow enough room to lip under 1/4" and tap it
flat with a rubber mallet before forming it over the top, back, and
ends so there will be no sharp edges to get cut with.
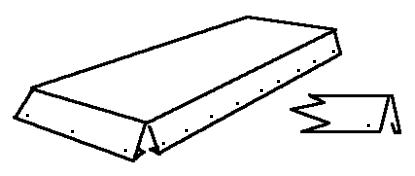
The metal would be laid
out like this. The inner
square would be the finished size of the cabinet top with perhaps
1/8" added to the L&W.
The 1/4" fold under's should be the first step. Then the 2" lips bent
down to fit over the top shelf. Similar with the splash garde. Then
small stainless steel tacks can be set every 6 inches to hold it in place.
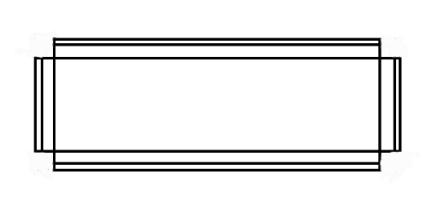
The counter top metal
folds as such before installing over the cabinet top. The splash garde needs a 2" piece removed at both ends on the bottom lip to allow for the legs.
This piece would cover the
header so the legs would
extend through the open
slots. This would then
attach with screws to the
back of the cabinet.
I painted the inside of mine white so I could see things in it easier in
low light. The outside was stained a darker brown wood tone.